Click here to go back to Website – Main Menu
To add a new client or edit and existing client page:
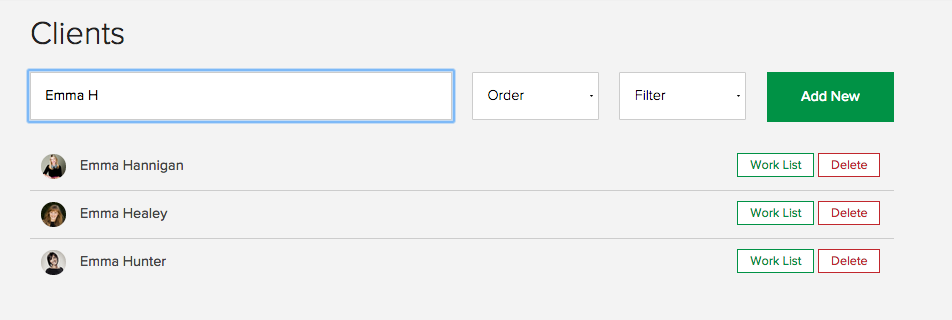
1. Select CLIENTS from the menu on the left hand side of the page.
2. Use the SEARCH field to find an existing client. Type their name in full. The search will automatically find the closest match.
TIP: If the client doesn’t appear after typing in first name or full name try searching using the client’s surname only.
3. Once your client appears click on CLIENT NAME to open the client’s admin page.
ADDING/UPDATING CLIENT INFO
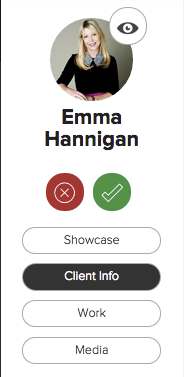
A CLIENT page always opens on CLIENT INFO. You can navigate to a client’s WORK, MEDIA and SHOWCASE via the labels menu below the Client name and Profile image.
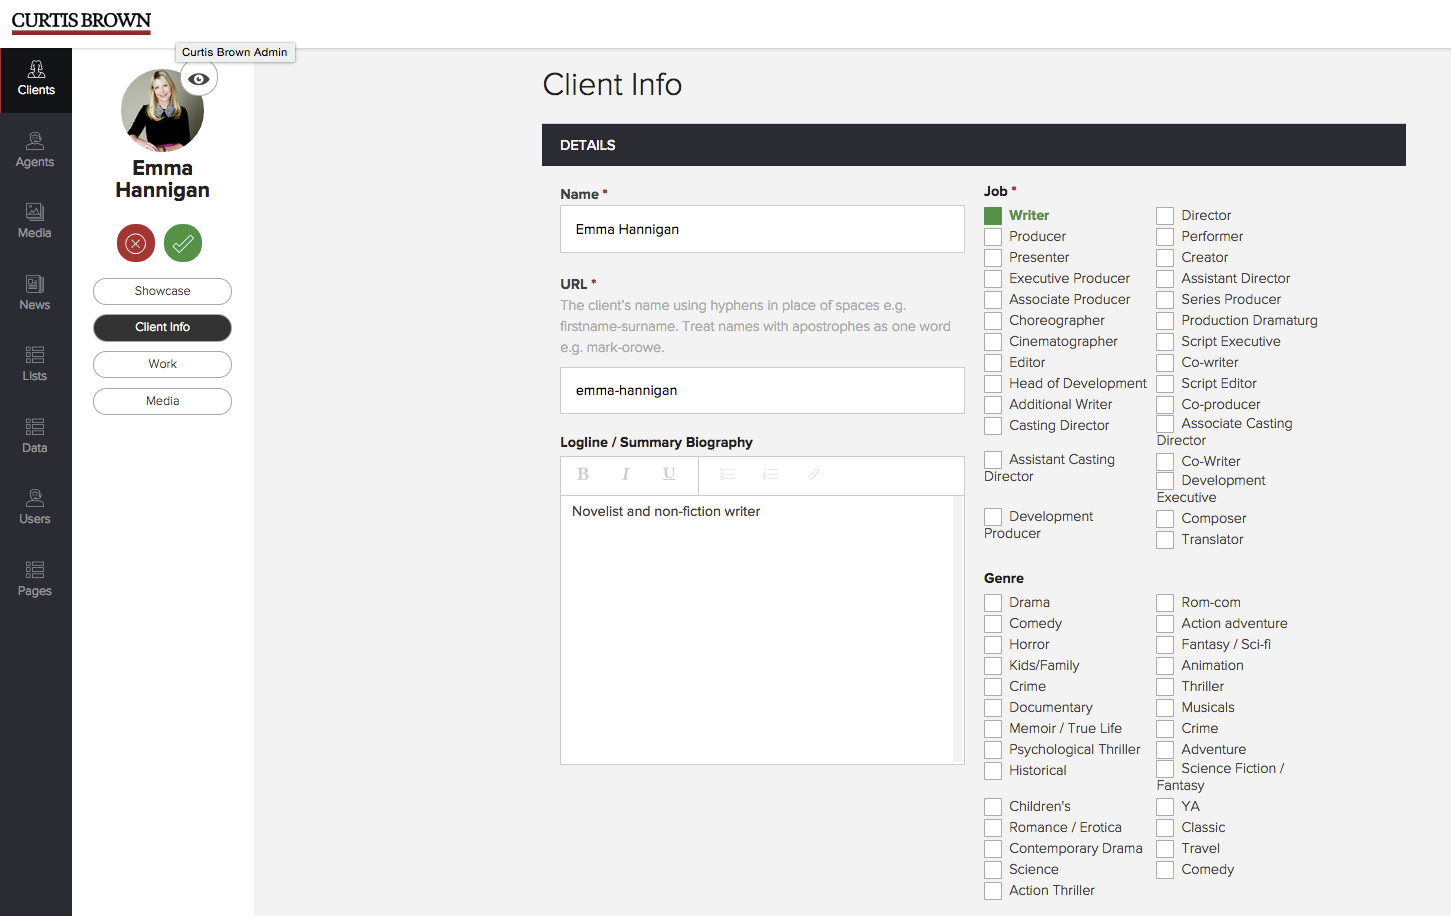
All clients have required details when adding. These are marked in the Client Info admin with *
If you don’t add these required details the client page will not save.
NAME* – Type in your client’s name in full. Follow the EDITORIAL STYLE GUIDE for name presentation (e.g. no punctuation for initials – SJ Clarkson)
URL* – Type the client’s name using hyphens in place of spaces e.g. firstname-surname. Treat names with apostrophes as one word e.g. Mark O’Rowe becomes mark-orowe.
JOB* – Select the box for the job/s the client is best known for. You may select more than 1 where relevant. All selected job/s highlight in green.
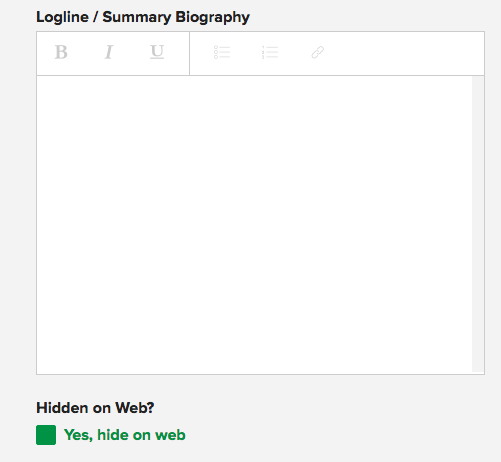
SUMMARY BIOG/LOGLINE
Type in the client’s official job title e.g.
BOOKS, TFTV, PRESENTER CLIENTS – Novelist, Writer for Television, Factual Presenter for Television and Radio etc.
ACTORS – 1 or 2 sentence description that sums up the status of the client, what they are working on, what you can currently see them in, best known for etc.
How to write a Summary Biog or Logline >>
SPOTLIGHT – Paste in the full URL for client’s spotlight page
IMDB – Paste in the full URL for the client’s IMDB page
TWITTER – Type/Paste in the client’s Twitter handle if you want to link their Twitter account to their showcase page e.g. MsEmmaHannigan
ESTATES – Only for Estates select the ‘Yes, client is an estate’ box. This automatically adds the client to the ‘Estates’ list.
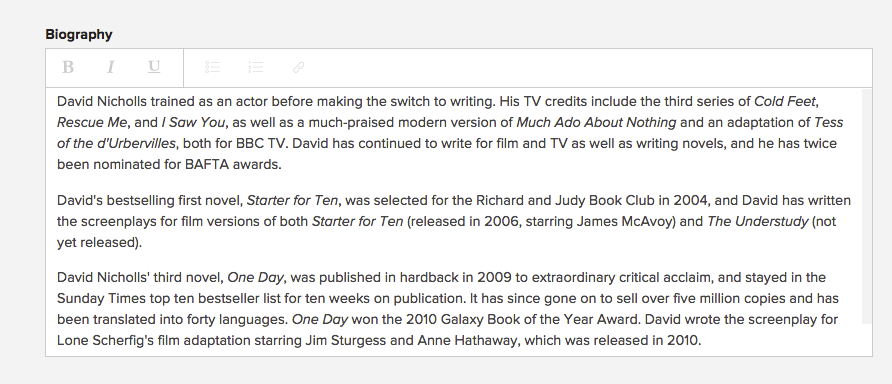
BIOGRAPHY
Type or paste the full biog into the text box. You can edit and make changes to the copy easily within the text box too.
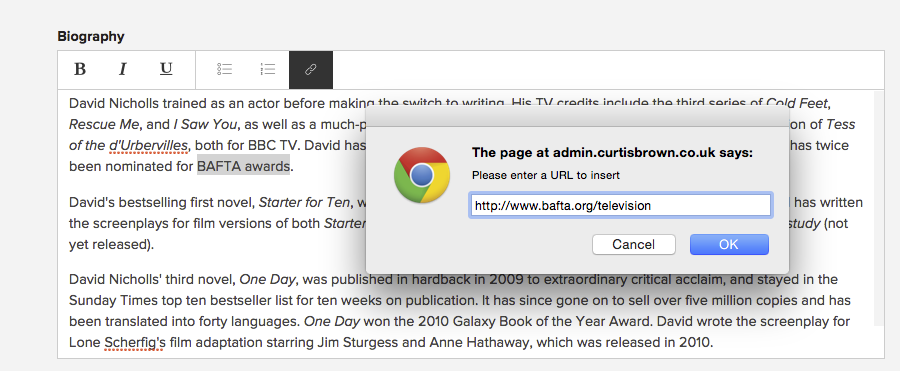
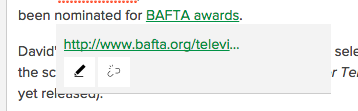
You can add LINKS to internal and external web pages within the Biog from words in the text. Highlight the word/phrase you wish to link to and click on the LINK icon (highlighted black in the image below). Type or paste the full URL in the box and click on OK.
To Edit or Remove a link in the text, click on the highlighted word/phrase.
Click on the pencil to edit/change the link.
The broken link icon removes the link from the text.
REPRESENTATION
You must select and add at least 1 primary agent to a client.
Type agent’s name in search field to find. Search will auto-suggest the agent based on your typing and select agent from search results.
Select Territory from drop down options (if territory option is not available see DATA) and click on ADD
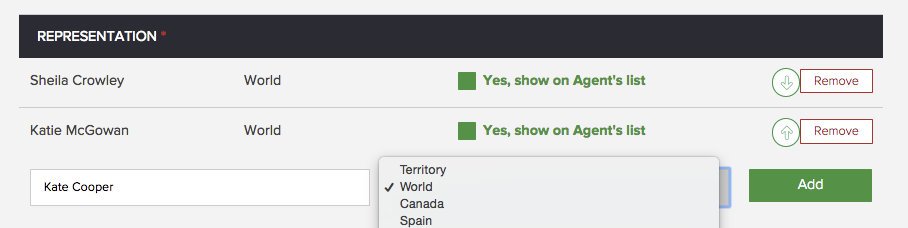
Use UP/DOWN arrows to move agent to correct billing. The Primary agent should always appear at the top of the list.
TIP: If you need to change/remove the Primary agent, add and move new primary agent into place first then remove.
If the Agent wants their client to appear on the personal client list leave ‘Yes, show on Agent’s list’ selected. If you wish to hide the client from the Agent’s list un-select this box.
CURRENT PUBLISHERS
Author clients will have publishers from all over the world. This list os published on the client’s page and is updated by the Translation Rights department.
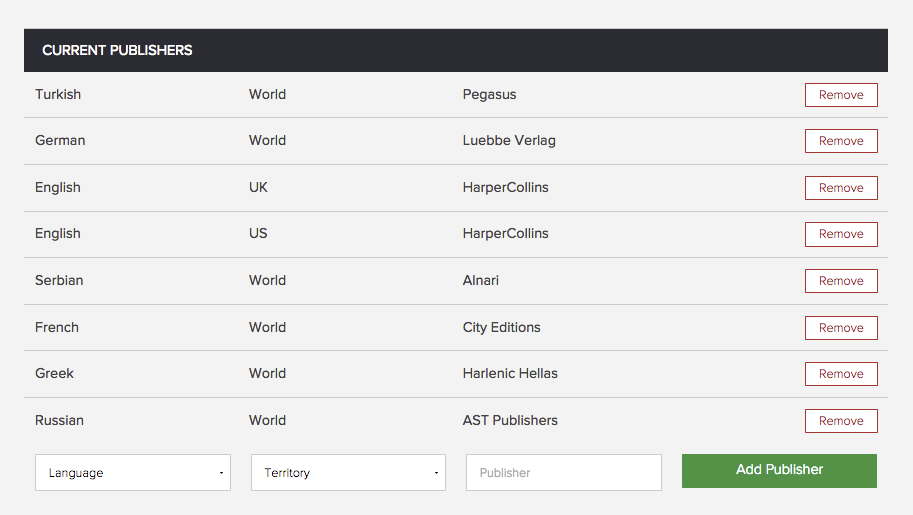
To add a new publisher select LANGUAGE and TERRITORY covered from the drop downs. Then type in the name of the PUBLISHER. The search will auto suggest the closest match/es for selection from our list of international publishers. Once all three fields are selected, ADD PUBLISHER.
If a language, territory or publisher is missing from the drop down list see Adding & Updating Data.
MEDIA
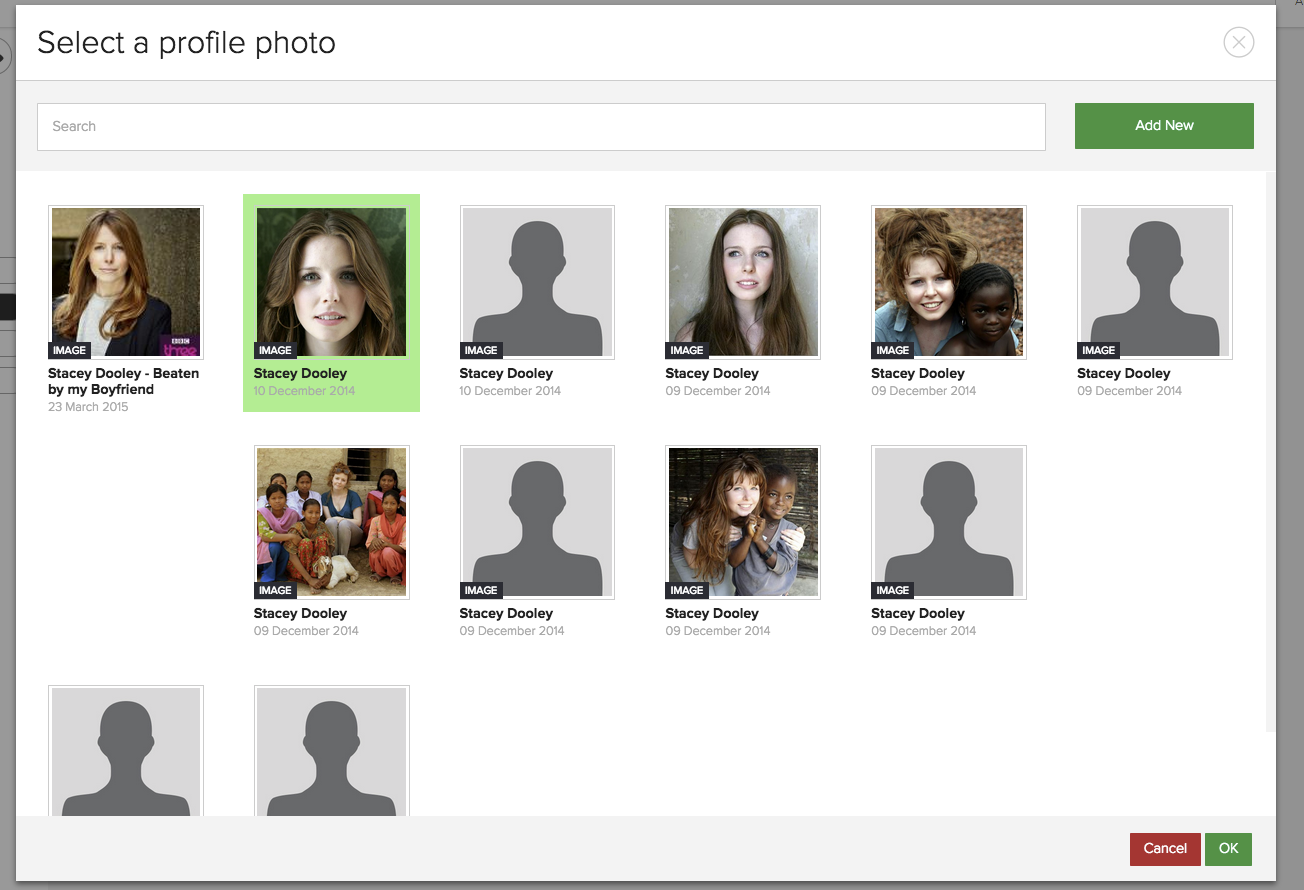
All clients should have a PROFILE PHOTO.
Click on CHANGE PHOTO. This opens the client’s MEDIA LIBRARY.
Select a profile photo from the Media Library by clicking on the preferred image.
Your choice will be highlighted with a green border.
Click on OK.
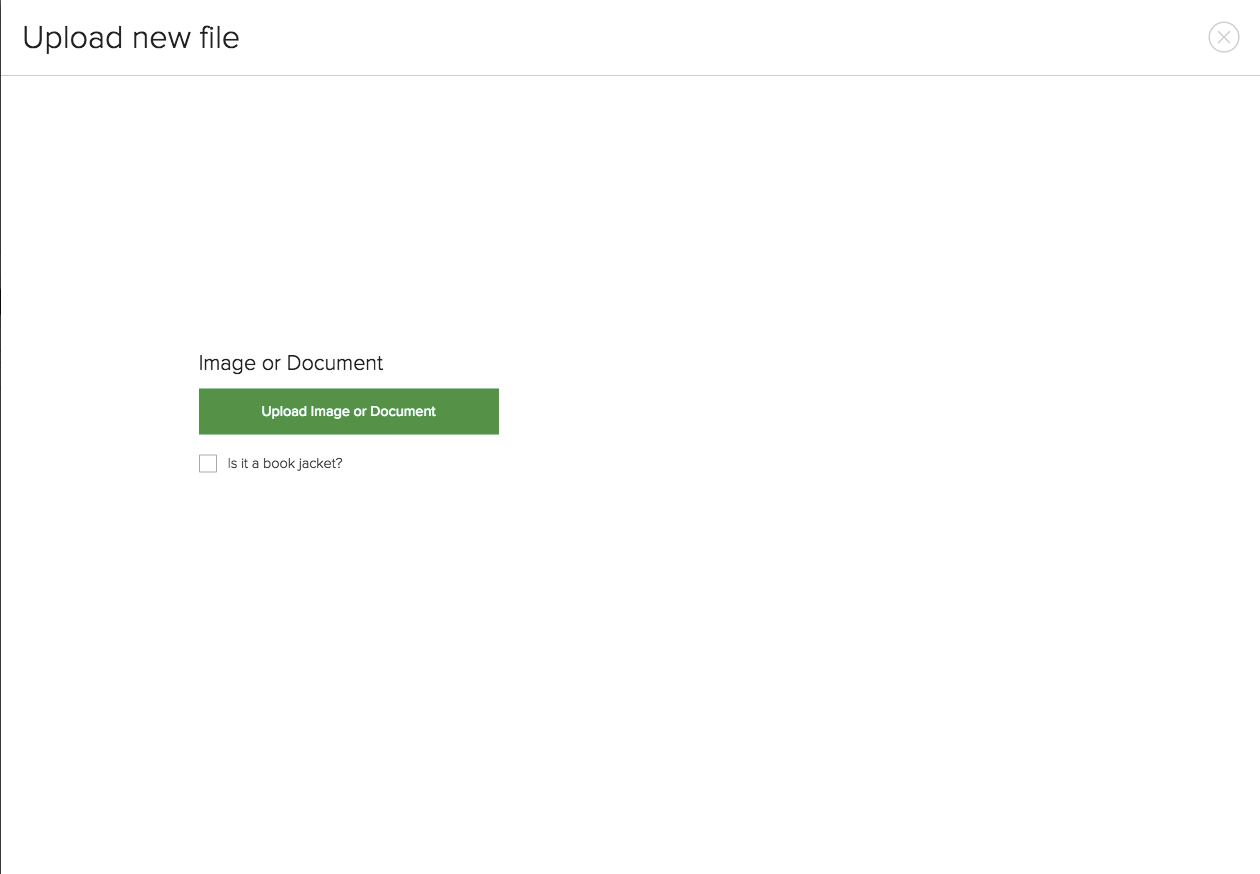
If you want to use a different/new image not listed in the Media Library ADD NEW.
Click on UPLOAD IMAGE OR DOCUMENT and select your new image from your PC files.
TIP: Always try to source the best quality Profiles Photo you can find. Images must by jpeg or png files and a minimum of 300 pixels wide. Please read IMAGE GUIDELINES for more information on image editing and acceptable image formats and sizes.
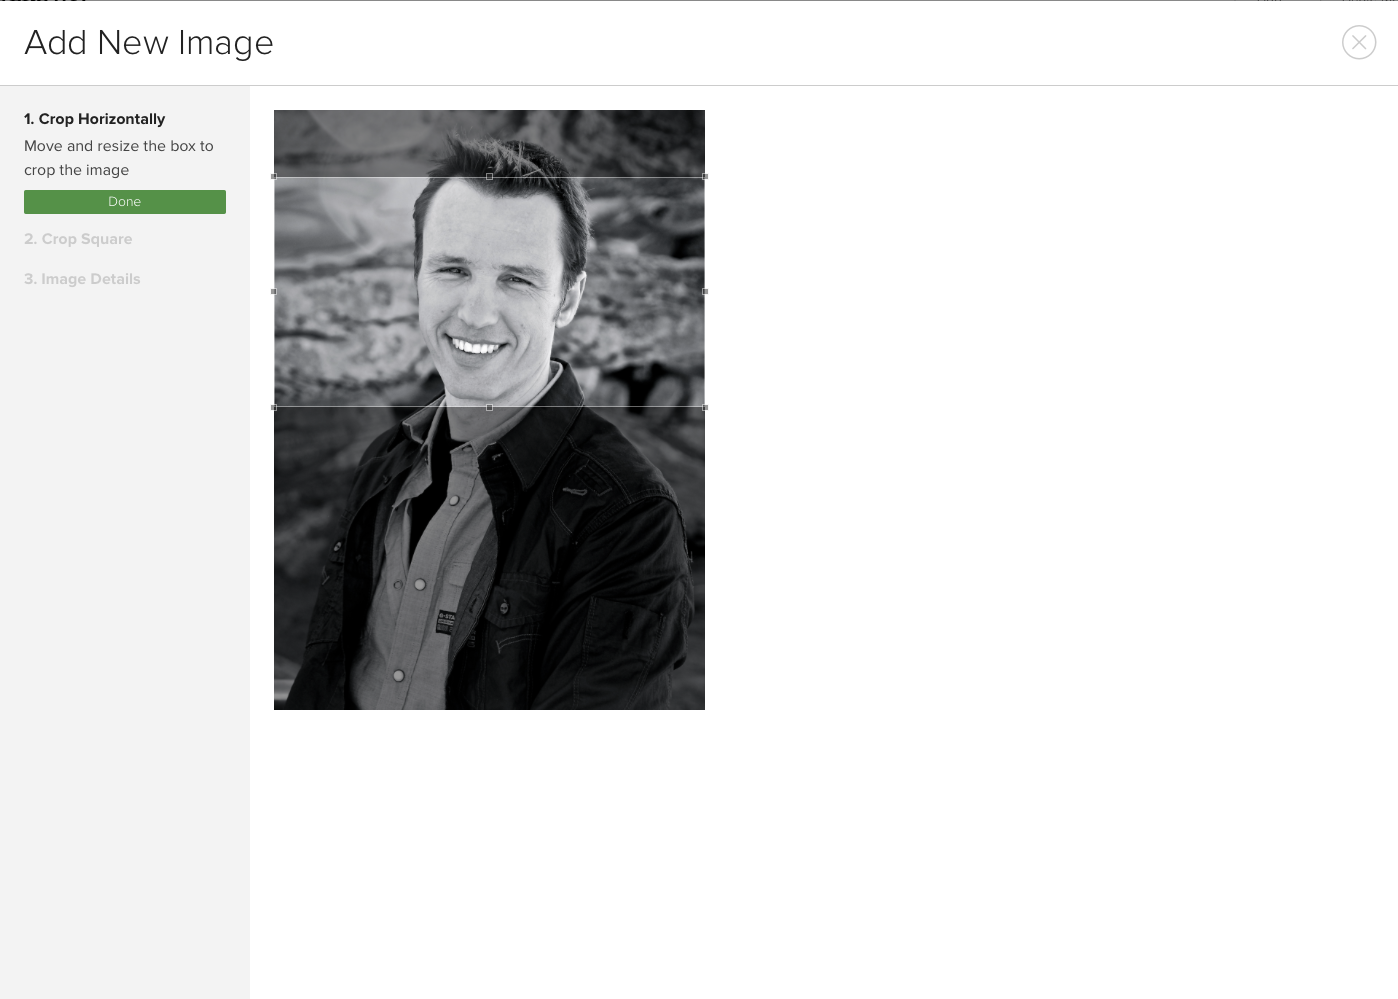
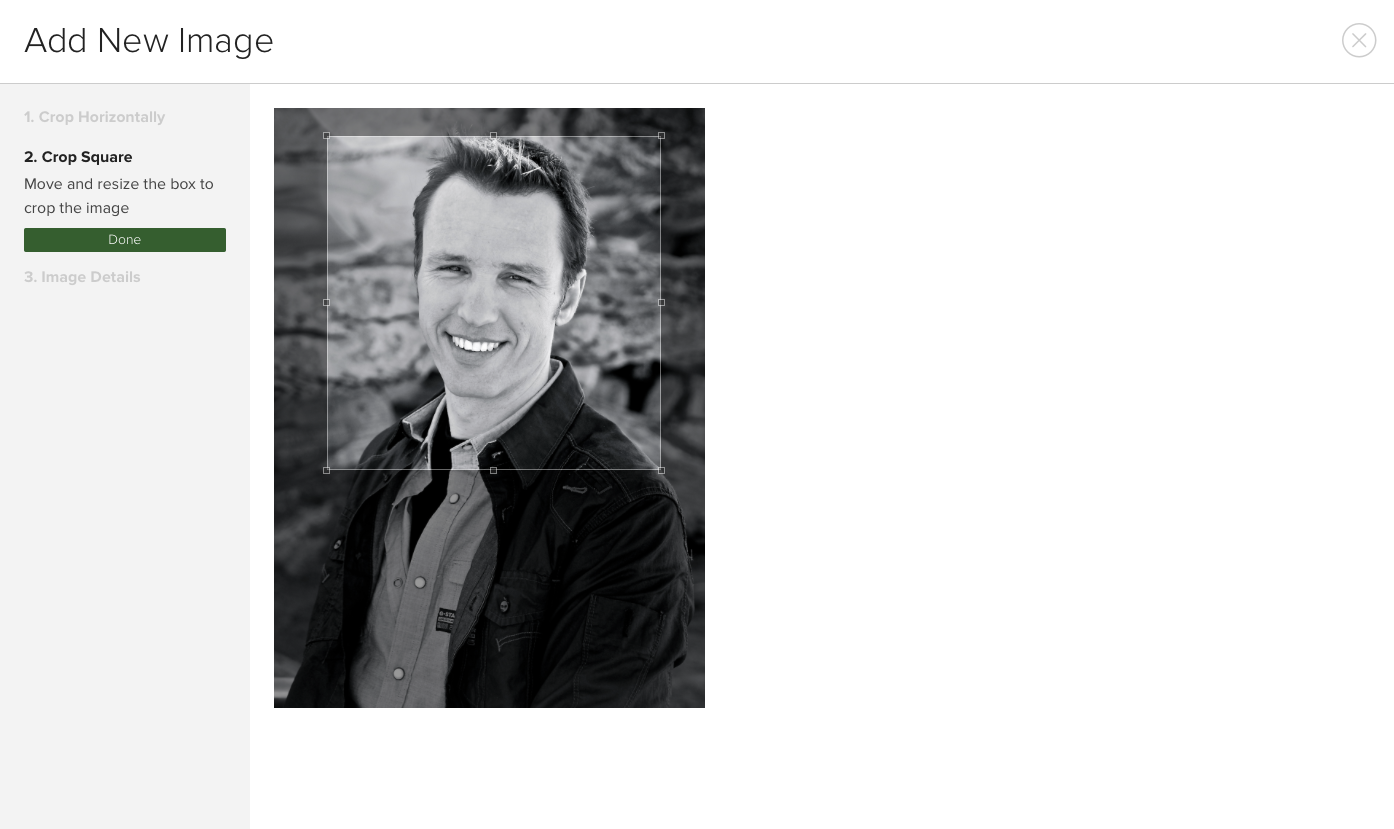
You then need to crop your image into two formats:
Horizontal Crop
Square Crop
Review all versions of the image that are saved and fill in the image details (Title is required, the rest are optional):
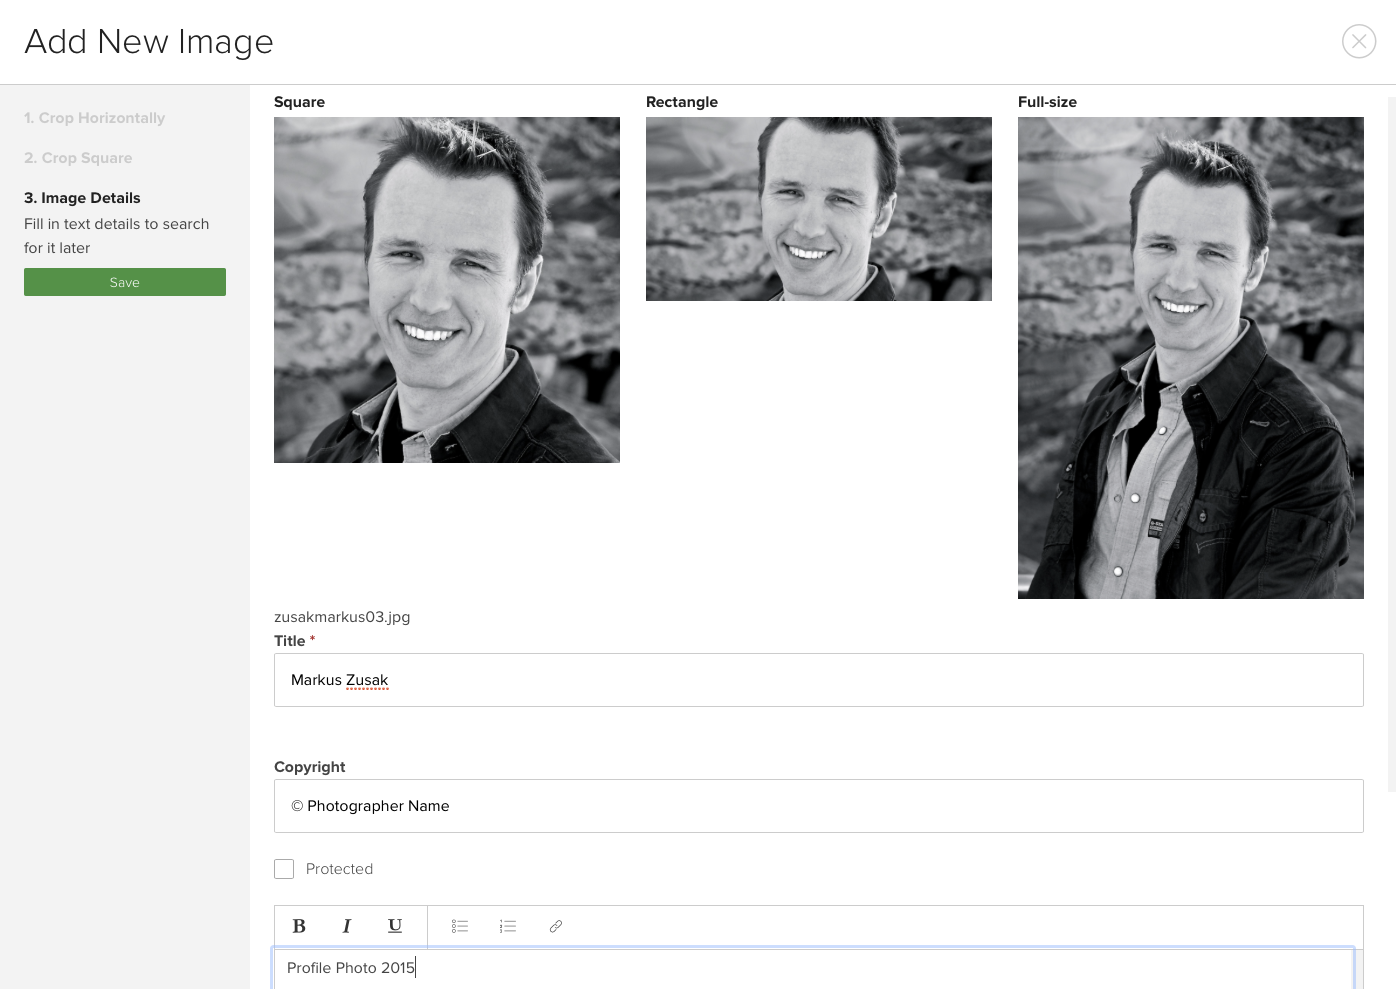
TIP: Always give the Image a proper title ie. name of client, project name written in mixed case. This is because the title is published to the front end of the website. It is also useful for the searching the image library.
Once you’ve added the details, click SAVE. Select the image and ADD to add it to the client’s profile.
ADD SHOWREEL
Actors and Presenter clients will usually also have a SHOWREEL to added to their Client page. You can update and change the showreel when needed.
Click CHANGE SHOWREEL and select the current showreel from the client’s Media Library. Click on OK.
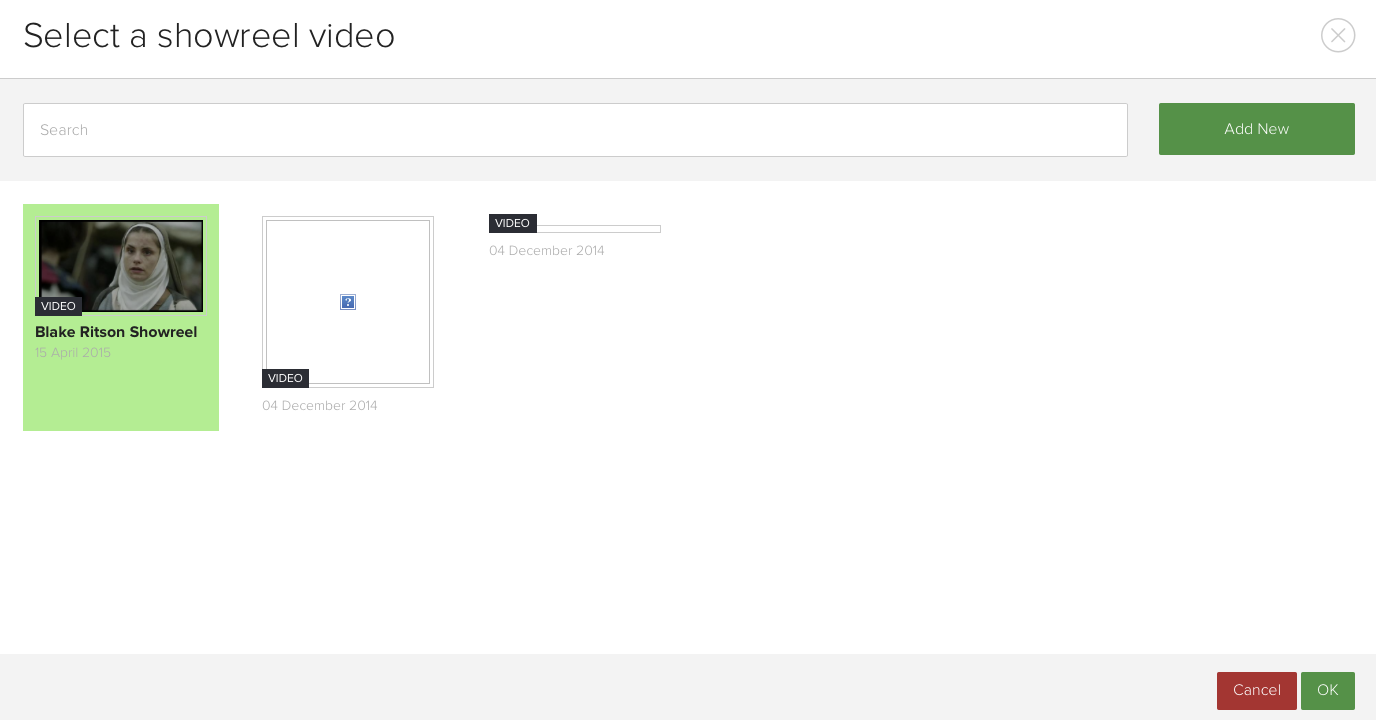
The showreel thumbnail will appear on Client Info page.
How to upload a video >>
SAVING YOUR WORK
When you have finished editing a CLIENT PAGE you must SAVE the page by clicking on the green circle:

If you make a mistake or you change your mind about the changes, you can discard your changes click on the red circle:

These buttons always appear under the Client Profile image and above the Admin Menu:
REMOVING/HIDING A CLIENT
Open Client page and go to CLIENT INFO. Under the LOGLINE/SUMMARY BIOG box is a checkbox which says ‘Yes, hide on webs’.
Check this box to remove the client from the website front end. It will turn green if the client is hidden from he website.
You may also use this checkbox while you are preparing a new client page. Don’t forget to uncheck when you are ready to publish!
Once you have hidden a client you also need to check that the client is removed from the Agent Client List. To do this UNCHECK ‘Yes, Show On Agent List’ next to the Agent info under REPRESENTATION. If you don’t do this the client thumbnail will still appear on the Agent Listing.